


I have been mildly obsessed with the Japanese art of Gyotaku lately. I have scoured the internet for different interpretations of this elegant art form. Some of my favorites came from this collection of 3rd graders on Artsonia.
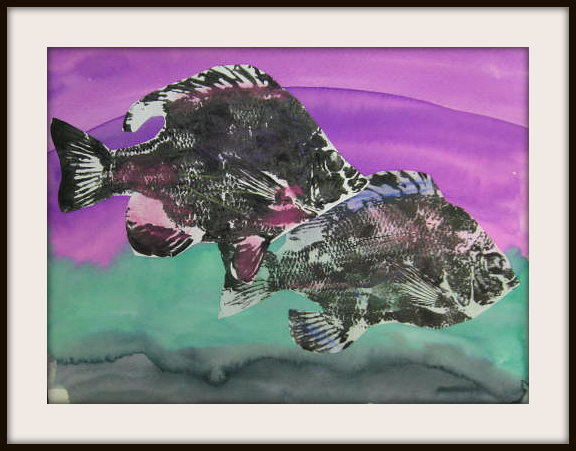
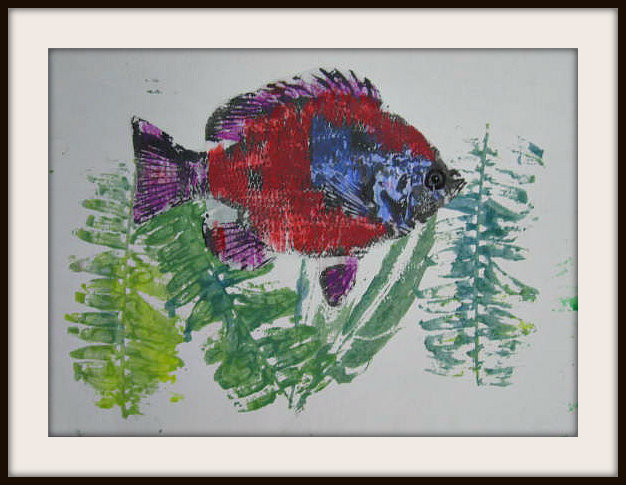
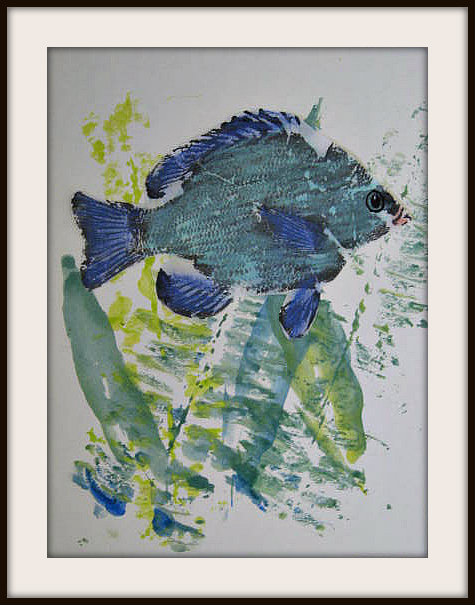
I wanted my two groups of K thru 5th graders to try a couple different methods for their Gyotaku. We worked with wet on wet watercolor backgrounds as well as creating prints using ferns, plants and feathers to mimic the look of seaweed. As much as I wanted to use a real fish, I opted for a lovely rubber blue gill. I thought the smell and the "gross out factor" for some, might be an issue that would distract from the overall lesson. (Though I am bound and determined to try this with the real thing eventually.) I allowed each student to make 3 prints with rice paper as well as regular printer paper. These dried quickly enough for the children to use chalk pastel to add color and definition to their fish. Some opted for realistic hues, while others let their imaginations run wild. Some children have more tweaking to do with their pieces on day two. This lesson was all about the exploration of media, but moreover, an introduction to this mid 19th century art form of "fish rubbings" by Japanese fisherman.
Supply List
Rice Paper or Printer Paper (81/2 X 11)
Watercolor Paper (9 X 12)
Watercolor Paints and Large Brushes
Black Ink or Watered Down Craft Acrylic Paint
Brayer or Sponge Brush
Chalk Pastels
Sharpie Marker
Scissors and Glue Sticks
Rubber "Gyotaku" Fish Found at Dick Blick or Amazon
Children take turns making prints of the fish by using a brayer or sponge brush to apply a think layer of ink or watered down craft acrylic. They will lay a piece of rice paper or regular printer paper on top and gently rub to get all the details transferred to the paper. Put these up to dry. For the backgrounds, children can use a wet on wet watercolor technique by painting their piece of watercolor paper with water only and then adding watercolor on top. Colors will "bleed" together. These are put up to dry. Once their Gyotaku fish prints are dry, children can add color by gently using the sides of chalk pastels and blending colors with their pointer fingers. Definition to the fish's eye can be added using Sharpie markers. Fish are then cut out and glued to their dry watercolor backgrounds.
These are nice. On using real fish, the gross out factor was part of the appeal for some of my students. It was fun!
ReplyDeleteI agree Angie! I cheated some for the "real" experience, but I had to weigh a lot of unique factors for my 2 groups. I will definitely try it again with real fish at some point.
DeleteBeautiful colors and textures.
ReplyDeleteAn elegant art form Indeed.
These look great! And even with a rubber fish I'm sure the children would have thoroughly enjoyed the process : )
ReplyDeleteThese are beautiful! I did some gyotaku with my PreK class a few years ago and they loved it! You might want to check out the work of some beautiful gyotaku artists on Cape Cod: http://bluewaterfishrubbings.com/ I love their work!!!!
ReplyDeleteWhere did you find the rubber fish????? However, my group of 3rd to 7th grade boys (guyZart) would love the real thing.
ReplyDeleteDickblick.com has an assortment of fish to choose from. Though, I wish they were a little larger.
DeleteMary - These are just beautiful!! I've used real fish in the past, but with our large classes now I was reluctant to try it. Seemed like it would take too many fish to last through a two day period. I actually like the idea of using the rubber fish (with maybe one or two real fish for the kids to try -- outside on the patio:))) I noticed that Nasco has them, too, but I will check out Blick's before ordering. Thanks.
ReplyDeleteThese are beautiful! I purchased some of the rubber fish for this school year from School Specialty in my classroom order. I got a little extra money to spend for supplies and decided to invest in some of the rubber forms. I got a fish collection for 5th grade and an insect and leaf collection to use with my 3d and 4th grades. I can't wait to use them! Thanks for sharing! :)
ReplyDeleteFor fish printing as well as nature printing in general, you should look at www.natureprintingsociety.org.
ReplyDeleteFantastic Mary.. ~Tina~
ReplyDeleteQue Bella, Mary! How can fish be this beautiful? I did this at an art teacher workshop with real fish and the disgusting dead eyes still haunt me! LOL
ReplyDeleteHa, ha!!! I am still laughing -- I'd forgotten about those eyes -- you are so right!!
DeleteOK... Now I'm feeling left out of the dead fish eye experience... yet another reason to use the "real thing"! :D Thanks Pat and Christie!
ReplyDeleteMy students have used the real and the rubber fish. They enjoy both. Kids work in groups helping each other so if one is grossed out the others pick up the slack. And the fish are popped in the school freezer when not in use. They lasted a few weeks for me until I could get to each class. Also, because of money constraints, I used just constuction paper. We used acrylic paint both regular and metallic. The metallic paint adds a nice shimmer that the kids love.
ReplyDeleteMary, can you please write up the steps of this project, and supplies? Also, how big were the fish? And how many class periods did it take?
ReplyDeleteThanks.
Andi
Hi Andrea. I added some basic instructions above. The fish I used is about 7 inches long. They sell a variety of different types, all about the same size. It would be fun to combine different types in one composition. This project took 2 classes to complete. Hope this helps!
Delete