Friday, November 21, 2014

Pandamonium


My Experiment 

The theme for this class session is Whimsical Animal Art. I just celebrated my 47th birthday and gifted myself with a theme that was lighthearted and fun to enjoy with the kids during the busy holiday season (and as an added bonus, some of these pieces would make great gifts for family and friends).  We are using various illustrations as inspiration for our mixed media pieces. This wonderfully rendered panda by artist, Jamie Mitchell caught my eye on Pinterest. My K through 6th graders created their pandas with Sharpie and charcoal and their own designer bow ties with markers. They then chose two coordinating pieces of scrapbook paper on which to glue their cut pandas. ( I spent 30 minutes agonizing over which pad to buy at Michael's. I have a major thing for patterned scrapbook paper even though I don't scrapbook). 
I adore the individual expressions on these hipster pandas!

Wednesday, November 5, 2014

Migrating Monarchs


Every year around November 1st, hundreds of thousands of Monarch butterflies arrive in Mexico from as far north as Canada. (Monarchs originating west of the Colorado Rockies arrive along the California coast) Because this coincides with the Dia de Los Muertos, many residents believe these are souls of their ancestors returning for their annual visit. What a perfect time for a Monarch art lesson! My 5-11 year olds created symmetrical butterflies by drawing one side with black oil pastel, folding paper in half and then rubbing the backside of the paper. More details and embellishments were made with marker, acrylic and watercolors. Flowers were made with oil pastel and watercolor. The children created their backgrounds by scraping dots of analogous acrylic paint with pieces of cardboard. Butterflies and flowers were then glued to their dry backgrounds.

Thursday, October 23, 2014

Halloween Crows and Pumpkins

 (6th)


 (4th)


 So striking Presley! (1st grade)


 (1st)


(1st)


 (Kinder)


(Kinder)

In honor of Halloween, my Mixed Media art groups created these collaged pieces using charcoal, chalk pastel, watercolor and acrylic. Since my classes often have a wide age range (K - 6th) I find this style of art helps everyone to feel successful. But I suppose this project was inspired by the very loud group of crows that have been gathering across from my bedroom window lately. Have a Happy Halloween!

Thursday, October 9, 2014

Sea Otters


 Such a sweet face Jenna!


I love the watery effect!

We kicked off our new Mixed Media Art Class session with these sweet sea otter pieces. This project was inspired by this gallery I found on Artsonia. The kids created their otters on black construction paper using chalk pastels. They followed a direct line drawing lesson to put down the basic shapes of their otters. I encouraged them to add texture with their pastels to create the look of fur (we learned sea otters have the thickest fur of any animal - 1,000,000 hairs per square inch!) Their backgrounds were created with watercolor to give the appearance of the otters popping out of the water. Artwork by K-6th graders.

Fun fact: Sea otters are social animals that float together in groups called "rafts" and hold hands when they sleep so they don't drift away from each other. So darn cute!


 When drawing animals I like to start with a photograph and break it down into a series of shapes. In this case I used this sea otter print 
http://fineartamerica.com/featured/sea-otter-portrait-brian-ray.html
Start with eyes first. They are relatively small and and pointed in the corners.
The otter's nose points upward and downward, (like 2 chocolate kisses glued together). From there I like to draw a furry head around those features, connecting to the tip of the nose on each side. Now add a furry little chin and small ears. A body can be drawn and stop wherever it enters the water. You may choose to add furry "arms" extending toward the mouth. We did this project in chalk pastel and I encouraged the kids to add as much texture as possible with the tip of their chalk to show the otters' thick fur. 
I hope this helps!

Monday, September 22, 2014

Tropical Bird Batiks

 Sonja, 4th grade


 Cora, 1st grade


 Sadie, 3rd grade


 Scott, 4th grade


 Andie, 3rd grade


Liam, 1st grade


Sorry for being such a blogger slacker lately! Fall starts a bit slower for me in my private classes as parents are trying to get in the swing of a new school schedule with sports and other activities. Since my summer class, Art Experiment Lab was such a hit with the kids, I decided to give it another go with my new group. It's a fun mixture of art and science. Our first project is always a winner, toothpaste and aloe vera lotion batiks. I was instantly smitten when I learned about this from Phyl at There's a Dragon in My Art Room, 4 years ago. In my summer class, I let the children choose whatever subject matter they wanted. This was a bit overwhelming for some, so I decided on a tropical bird theme with my fall crew. I did a few line drawing lessons on the white board and encouraged the kids to fill their space to keep the compositions interesting. Amazing how one thrift shopped bed sheet and some Dollar Tree materials could be used to create such beauties!

Wednesday, August 27, 2014

Summers' Big Finish

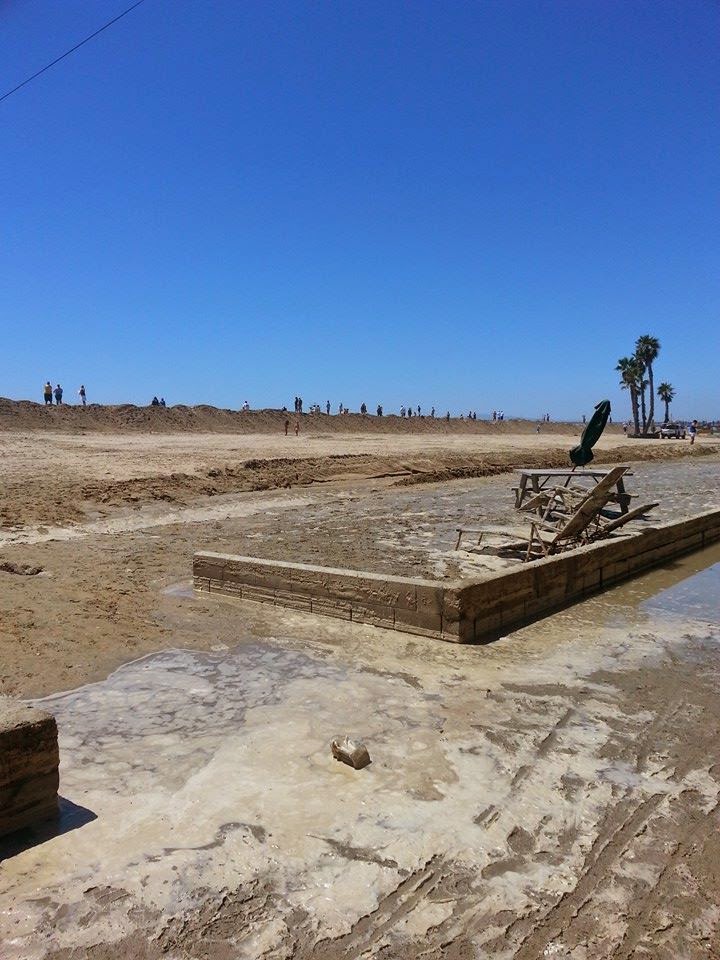
 Feeling the effects of Hurricane Marie


 My Mom happened to be visiting today and she was
 totally game for climbing the berm to see the waves with me.


The calm before the storm - taken just hours before it hit.

Lifeguard tower 8 is down


 My daughter, Savannah and I shared some wonderful sunset strolls this summer in clearly calmer conditions.


Today was not only the first day of school for our local public schools, it was also the day to witness the effects of Hurricane Marie. This is fairly uncommon in these parts, and more of an east coast norm. So, it brought out the lookie-lous (me included), the media, and the crazy/brave surfers. I'm hoping for a swift end to these extreme conditions. Mother Nature has let it be known she is large and in charge. 

Tuesday, August 12, 2014

Bubble Prints with Jellyfish


Today was the last day of my Art Experiment Lab class as well as my summer art series.It's been Wonderful! (I still have plans to post their salt dough pieces and toothpaste and aloe vera batiks soon).
I found many bubble print ideas on Pinterest and decided to use a recipe of dish soap, water and watercolor. Tempera paint, bubble bath and bubble solution were alternatives. This is a great project to use what you have on hand. It's messy! So I'm glad I purchased some disposable aluminum containers to ease clean-up.

Basically the kids mixed a combination of 2 tablespoons of liquid watercolor, about 1 tablespoon of dish soap and 1/4-1/2 cups water in a plastic cup (we adjusted when needed). They taped 5 straws together to give them more "bubble power". Then they began to blow, and as the colored bubbles rose past the lid of the cup, they took their watercolor paper and laid it on top, making a print. I offered a variety of colors that they could swap around. They obviously kept their same straw bundles and rinsed or wiped them before changing to a new color.

These made cool looking organic abstract art pieces all on their own. But I decided to add the element of chalk pastel jellyfish. (Maybe inspired by my daughter's insistence that a jellyfish was ever present during last weeks' body boarding venture) These were done on rice paper to mimic the translucent quality of jellyfish. But given the fragile nature of this paper, basic copy paper would be a fine alternative. The children drew simple jellyfish bodies with chalk pastel, blending in "little circles" and leaving the centers white to mimic the translucent look. They were then cut out, glue "sticked" to their dried bubble prints and then pastel tentacles drawn on top of their bubble art. (K-5th art)

Bubble prints were a real crowd pleaser!


Here are some of their bubble prints on their own - really beautiful actually