Thursday, November 17, 2011

Tints and Shades, Contour Animals and Bigfoot!?

Rory, 2nd grade


My experiment for the lesson


Savannah, 4th grade


Breanna, 2nd grade


Paige, 2nd grade


Abby, 2nd grade


Matthew, 2nd grade


Alexa, 1st grade


Ryan, 4th grade


Zach, 4th grade
love his lone angry pig


Ella, 2nd grade


This quirky art project began as a simple contour animal drawing lesson. I found this adorable pig and rabbit via Pinterest. I liked the line qualities and thought each child could create their own story to go with their contour animals a la Beatrix Potter. Last week a few of my 4th grade girls pleaded with me to do a Bigfoot art lesson. Bigfoot!? I didn't see that coming. Well, I thought a tint and shade backdrop for their creatures would be a great basic lesson for my group to learn. And as an added bonus, those who wanted, could add in a silhouette of Bigfoot. From there, they could make up their own stories to go with their art if they chose. They really had a ball with these. And I was so amused at all their commentary while creating their pieces.


We started with our animals first doing a direct line drawing lesson. After they went over their drawings with Sharpie, they used chalk pastels or colored pencils to add color. These would be cut out and glued to their background. They could choose blue or purple to create their tint and shade moonlit landscape. We started with a large half circle of white and added more and more color for our tints and then switched to black to create our shades. This of course is a great lesson all on its' own. Details including trees and of course the lurking silhouette of bigfoot were added last.

Tuesday, November 15, 2011

Beetle-Mania and "Work of Art" Project


My example


This was a fun and quick multi-media art project I originally saw on The Usborne Complete Book of Art Ideas. Recently I saw a couple inspired pieces on Pinterest. The first week the children created simple oval shapes and backgrounds using chalk pastel. They used a small brush and watered down black tempera (in lieu of ink) to create their beetle details. A watercolor border is added and then some splatters using more watercolor. The following week they added more details in oil pastel and chalk pastel and finally the option of words in Sharpie. These pieces were created by children ages 6-9.

Meri Cherry the fabulously creative Kindergarten teacher has created a fun opportunity for anyone to create a work of art inspired by a newspaper headline taken from last week's challenge on Bravo's "Work of Art". See the details on her blog Here. This isn't a competition and no one is being sent home. Ha! Just a fun creative outlet. I know everyone has a lot going on, this doesn't have to be a labor and time intensive project. I think I'll have my nine year old daughter join in on the fun. (I think this sounds like a great alternative to battling the crowds on Black Friday). If you're interested just drop her a comment. (And she's added a fantastic incentive!) Deadline is in 2 weeks.

Wednesday, November 9, 2011

Jesse Reno Meets Jennifer Mercede


My example


My November art class students are creating pieces inspired by two Portland, Oregon artists, Jesse Reno and Jennifer Mercede. Both artists have been described as primitive, outsider, free spirited, and spontaneous. I find myself increasingly drawn to this type of art.

To create our pieces, we first decided if we wanted a warm or cool palette for our background. We used cotton balls or fingers (a signature Reno technique) to create an expressive base using acrylics. While these dried the children chose between a hummingbird or giraffe to create on long black construction paper using black oil pastel and then chalk pastels. (Jennifer Mercede's giraffe and hummingbird are just two whimsical creatures that have been heavily pinned on Pinterest.) More details can be added with oil pastels. The creatures are cut out and glued on the painted backgrounds. Next week the children can decide to blend in some chalk pastel colors to their background, (which I did with my example) add doodles or words with thin Sharpies, (this is common in the works of both Reno and Mercede) or leave as is. More pieces to post from my 1st through 4th grade students.

Thursday, October 27, 2011

O'Keefe Inspirations


Acrylics and tissue paper

My "fearless" creator Talia (7) was not happy with her painting and she regretted not painting it more simply . It is Gorgeous and I couldn't disagree more. But this brought up a conversation about the importance of taking risks as an artist and not always playing it safe. These children are only in the 2nd grade, but I wanted her to treasure her loose and free spirit. And of course I told them no artist likes every piece they've created, even the "greats." It's important to have fun with the process.


I love the bits of white showing throughout this piece.
Tissue paper and acrylics


This 8 yr old has the style of a graphic artist -
Precise, confident lines and a love for painting with minimal
color palettes


Beautiful work Paige! Acrylics


We had one more day left for my Tuesday afternoon art class and I had a unanimous request to do a Georgia O'Keefe flower project. I'm always game for that! But I wanted to try a new approach. I found these lovelies on Artopotamus. They were created with tissue paper, watercolor and chalk pastels. But with just one class, I had to make some adjustments. We started out with large board and tried creating asymmetrical flower compositions with pencil and then Sharpie. For those who wanted to use tissue paper, we just ripped pieces and decoupaged them to our boards with watered down glue. While still wet the children added acrylic paint in analogous colors and white to their compositions. We looked at photographs of flowers to see the variety of shades and colors in one flower, rather than just using one flat color. The pieces were dry enough by the end of class to go over our Sharpie lines again or switch to black oil pastel for extra boldness.

Wednesday, October 19, 2011

Treescapes, Two Ways


Talia, I love how you never care to look at the others' work.
Your art is always what you want it to be. :)

My example


I have been doing so many animal themed art projects lately, I thought it was time for me to do a some nature based lessons. It is especially appropriate given this beautiful time of year. (Yes, even in Southern California there is a hint of fall in the air.) The first lesson was inspired by the gorgeous treescapes I found on Flickr here. The quality of artwork from the students of this art teacher just blows me away. I could "pin" every single piece. To start I had the children dry brush onto large black construction paper. I gave them acrylics in the primaries and purple and asked them to brush from side to side. No need to clean their brush, just continue onto the next color. They could also choose any order to paint their colors. This allows for such unique results. Because acrylics dry so quickly, they were able to do the next step during the same class. We used oil pastels to create our trees. From here they had two options, to create leaves using oil pastels or (in thinking of my kindergarten students) they could dip their fingertip in yellow, orange and red paint to create their fall leaves. They could also add a moon, stars, shadows and some grass or plants if they chose.

The inspiration for my next treescape was found via Pinterest at the Georgetown Elementary Art Blog. I knew my all girl class would love to create these brightly colored backgrounds with silhouette trees. I offered a variety of acrylic colors and they could choose how simple or elaborate to make their backgrounds. Once this was dry they used small brushes to paint their tree silhouettes. (artwork by children 5-7)

Wednesday, October 12, 2011

Painterly Peacocks


"Miss Mary, I really want to put purple polka dots on my peacock's beak to make it beauteeeful." Hannah, 5


This week my class created some wonderful painted peacocks. I wanted them to be loose, painterly and expressive with their birds. So I had them start by using sponges to swirl acrylic paint onto their boards to create a feathery impressionistic background. While still wet they painted the body and the "eyes" of their feathers. Once the background was dry, they used oil pastels to finish the details on their feathers and finished their paintings with the eyes and beak. These works were created by girls 5-7.

On a side note, my daughter and I went to the Los Angeles Arboretum early this summer just in time for peafowl mating season. (hundreds of peafowl roam the grounds freely, descendants of the birds first imported from India by the wealthy original landowner, Lucky Baldwin back in the late 1800's.) What a treat to see the peacocks fan their feathers and literally strut their stuff trying to get the attention of the peahens. But we laughed because the females just looked bored and uninterested no matter how proud the males were of their beautiful plumage. (Insert joke regarding parallels with human behavior here ;)

Saturday, October 8, 2011

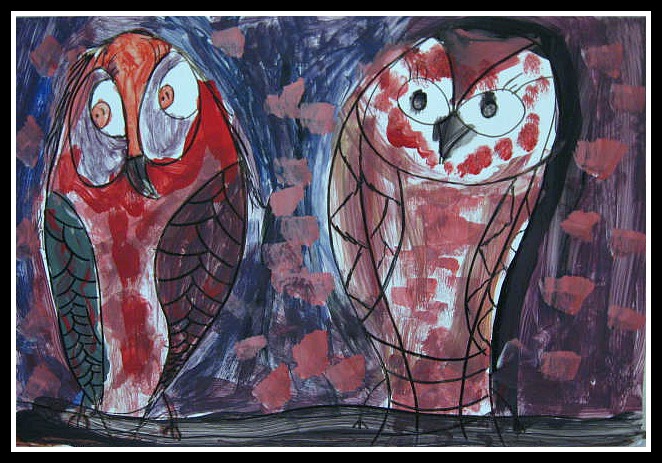
Piatti Owls, Take Two

Paige (7)
Sharpie Markers and Acrylic


Ella (7)

Talia (7)


Lilly (5)

Hannah (5)

Brianna (7)


My October session art students looked at the work of Celestino Piatti. For this group, I gave only the primary colors and black and white. We talked about adding designs and patterns in the way Piatti did in his graphic owls. This was the first opportunity for some to mix paint and it was fun for them to come up with their own color palettes for their owls.